Documentation
Installation
1) Files installation
After ordering a license for your server ip and name through our online form, and receiving an order confirmation, login as root and issue the following commands :
# cd /root
# wget https://secure.zimbra-plugin-for-cpanel.com/updates/tzbm-latest.sh
# bash tzbm-latest.sh
The installation will then proceed automatically.
Once you're back at the prompt, you should see the following output :
----------------------------------------------------------------------
Install TZBM license and update cron files
----------------------------------------------------------------------
Install cron file
« syst/tzbm.cron » -> « /etc/cron.d/tzbm.cron »
Get license

======================================================================
TZBM plugin successfully installed
======================================================================
If some error message appears during this process, do not hesitate to contact us.
To verify the installation go in WHM Plugins section, you should see a new Business Mail menu.
2) Update
Once the plugin installed, to ensure you have the last version, trigger a manual update by running the following command :
# /var/cpanel/tzbm/bin/getLatest.shFor compatibility with Zimbra 8.7.x, check from the WHM plugin interface that you are running a version equal or greater than 1.0.5.
3) Firewall configuration
Communication between cPanel and Zimbra servers are done on the port 7071. You then have to allow requests to port 7071 in your firewall.
If you use CSF as your firewall, just add this port to the TCP_OUT variable of your csf.conf file.
WHM configuration
1) Access WHM interface
Once logged in to WHM select Plugins then Business Mail menu :
You should then see the following interface :

2) Define Zimbra servers
The first thing you have to do is adding at least one Zimbra server.
On the Server Configuration section click on the New button and fill the form :

| Server | The URL to access your Zimbra server. |
| Username | Administrator username for this Zimbra server. |
| Password | Administrator password for this Zimbra server. |
| Admin email | Email to send notifications to. |
Then click Save. A Delete button is now displayed.

Note that if you over the Password field with the mouse pointer, you will see the password unencrypted.
The configuration of the Zimbra servers is saved in the file /var/cpanel/tzbm/etc/bm_server.
3) Define Package configuration
If you want, you can define Business Mail support at package level.
The package must already be defined using the tools provided by WHM.
Click New and fill the form :

| Package name | The name of the package your want configure BM for. |
| BM type | The type of BM support :
|
| BM number | The number of Business mailboxes. |
| BM disk quota | The total amount for all Business mailboxes. |
| Server | The Zimbra server to define mailboxes on. |
Then click Save and 2 new buttons will be displayed :

The Delete one will remove this Business Mail package configuration and Business Mail configuration for every account of this package.
The Apply one appear for the new configuration to be applied to all
the accounts that are using this package.
It is displayed as long as the configuration is new or have been
changed and has not yet been applied.
The BM package configuration is saved in the file /var/cpanel/tzbm/etc/bm_package.
4) Apply and Delete Package configuration
Business Mail configuration for an account may be defined at two level. This configuration level is called BM Policy and could be seen in the Account Configuration section :
| Policy package | The Business Mail configuration for this account is defined by the Business Mail configuration of the package this account is in. |
| Policy user | The Business Mail configuration for this account is a custom configuration. This policy is strongest than the package one. |
Applying or deleting a package configuration will have different results depending the policy of the user account :
| Apply | The package configuration is applied for all accounts of this package that are in one
of those two states :
|
| Delete | Deleting the Business Mail support for a package that means two things :
|
At this time, to avoid complexity and error, we don't hook in cPanel events, then if you already define your Business Mail package configuration for one of your package and you add a new account of this package type, the Business Mail configuration will not be added to this new package. To have this new account support Business Mail as of the package configuration, you have to do the following :
- Save the BM package configuration (even if no change was made).
- Apply the new unchanged configuration.
Once a package configuration has been applied to an account that didn't support Business Mail yet (or was of package policy), a file with the same name as the account is created (or updated) in the following directory :
# ls /var/cpanel/tzbm/etc/bm_account/
-rw-r--r-- 1 root root 73 15 mar 12:31 example
This file contains the following configuration :
# cat /var/cpanel/tzbm/etc/bm_account/example
[example]
policy = package
number = 4
quota = 20
server = zimbra.example.com
Note that removing the Business Mail support for a user or a group of users (having the same package) don't delete the associated mailboxes on the related Zimbra server. The Exim configuration on the cPanel server is also not updated. That means the Business mailboxes are always defined/available/up and running.
To fully delete BM support, BM mailboxes and BM redirections for one or more accounts, please read the section 9) Full remove below.
5) Refine configuration at user level
Business Mail configuration can be refine for particular accounts that already support Business Mail through package configuration or not.
In the Account Configuration section, click New and fill the form.

Then click Save to save the configuration.
If the account didn't support Business Mail yet, the following file will be created. If the account already supported Business Mail through pacakge configuration, the file will just be updated :
# cat /var/cpanel/tzbm/etc/bm_account/example
[example]
policy = user
number = 8
quota = 12
server = zimbra.example.com
The policy is changed to user and the information related to this account is completed :

6) Delete Account configuration or change Policy
Both deleting an account configuration or changing it's Policy to package as the same effect :
- If the account is of a package that doesn't support Business Mail, the BM configuration is deleted.
- If the account if of a package that support Business Mail, the BM configuration of the user is replaced by the one of the package.
7) Debug and non BM link
If for some reason you want to increase the debugging level to track connection problem with your Zimbra servers, you can do it in this section.
Note that using the debug level will write your passwords unencrypted
in the PHP log file.
(/usr/local/cpanel/log/error.log)

What next you can configure here is the link that will be shown to the users which doesn't have BM support but have the Business Mail icon displayed in their control panel :
| Key | A drop-down list that contains the resellers name on the server plus a first "default" entry that is used when no configuration have been done for a particular reseller. |
| Value | The link that will be shown. The special pattern @LOCALE@ could be used. It will be replaced by the locale of the customer connected to its cPanel interface. |
This section give a simple configuration for your resellers that whant to sell your business email support with their own branding.
8) Update the Business mailboxes list
To know which mailbox is of BM type, the plugin manage a file containing the list of such mailboxes.
# cat /var/cpanel/tzbm/etc/bmaccounts
john.doe@example.org:zimbra.example.com
jean@example.org:zimbra.example.com
This file is used by Exim when delivering emails and is updated by the cPanel part of the plugin when a user add, remove or change a Business mailbox she own.
If you have deleted a mailbox on the Zimbra server, this file need to be updated.
To process with this update, just click on the Update button of the section Update Mailbox List File.

Note that to ensure consistency the content of this file is generated by requesting the configured Zimbra servers. Then every mailboxe from those servers that corresponds to an existing domain on your cPanel server will be present in the file.
9) Full remove
When removing BM configuration through the WHM plugin interface, only the configuration is removed. The associated mailboxes on the related Zimbra server are not deleted and the Exim configuration on the cPanel server is not updated which means the Business mailboxes are always functional.
To fully remove Business Mail support and mailboxes for an account, you have to do the following steps :
- Remove the BM package configuration for the package used by this accout or change the package of the account for a package that don't have BM support, which is certainly the best solution.
- Remove the BM user configuration of the account.
- Delete the mailboxes on the Zimbra server.
- Regenerate the Business mailboxes list.
In cas of a problem, if the account use a package that don't support BM, you can have a look in the
BM configuration directory (/var/cpanel/tzbm/etc/) delete the file
corresonding to the account that could be present in the bm_account/
subdirectory.
cPanel configuration
1) Display Business Mail icon in account cPanel
For your customer to be able to define Business mailboxes on your Zimbra servers, they need to have access to the cPanel part of the plugin.
To achieve this, update your Feature Lists to enable Business email :
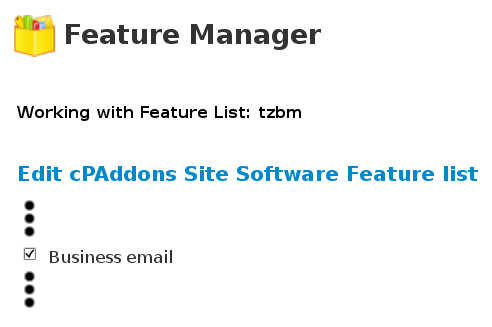
The accounts using this feature will show the Business Mail icon in the Mail section of the control panel at the second position :

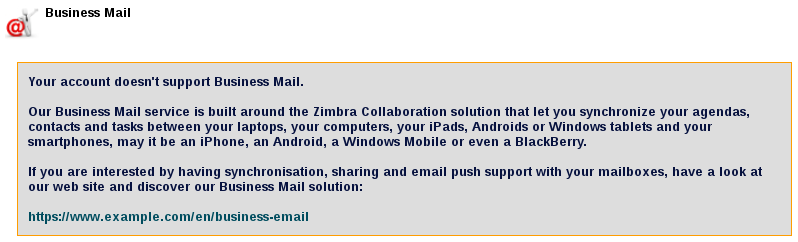
If you checked Business Mail feature but didn't add Business Mail support for an account, the user will see
an information message with a link to go to your Business Mail web page :
Note : If the user is a customer of one of your resellers, the
link could be customized (in the WHM plugin part).
2) Define a Business mailbox
When the user have clicked on the Business Mail icon she will show the following interface :
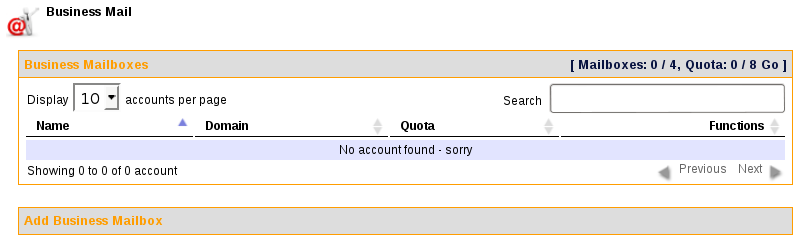
On the top right is displayed information about the number of Business mailboxes and total quota it ows and what is currently used.
A click on the Add Business Mailbox panel will display a form to define a new Business
mailbox :
This panel is displayed only if the user have undefined mailboxes and unused quota.

Enter some parameters for the mailbox, define its quota and click Create Mailbox.
Hover the ? sign with the mouse to see the requirement for the password.
When the user create its first Business mailbox for a domain name, the associated domain is created on the Zimbra server. And when she delete its last Business mailbox for a domain name, the associated domain is removed from the zimbra server.
The Business Mailboxes list is now updated :
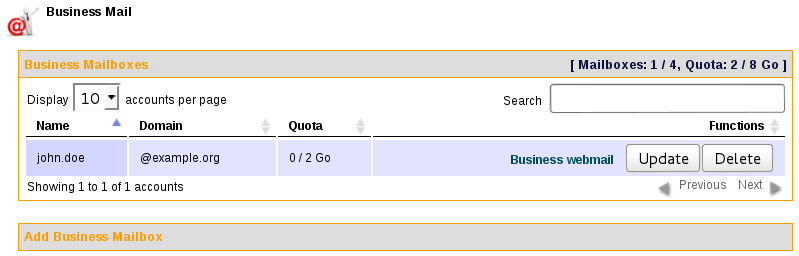
For each Business mailbox the following information is displayed :
- The current used quota.
- A link to access the Business webmail.
- Buttons to update Business mailbox parameters or delete it.
3) Update a Business mailbox
A click on the Update button for a mailbox will display the follwing interface to let the user update the password or the quota associated with this mailbox :

The mailbox is diplayed in the top panel to avoid errors and the requirement for the password could be shown when hover the ? signe with the mouse.
4) End user configuration
To let the user mix Business mailboxes with normal mailboxes, the MX record of the user's domain should be the cPanel severs.
When a new domain is created on the Zimbra server, the following A record is added in the domain DNS configuration :
businessmail 14400 IN A 123.45.67.89The end users should then use the following parameters for their mail configuration :
| Servers (SMTP, IMAP, POP) |
businessmail.example.org |
| Webmail | https://businessmail.example.org |
5) Forwarders
Defining a forwarder on a Business mailbox is as simple as defining a forwarder on any other normal mailbox of the account, just use the Forwarders tool from the cPanel interface.
Since the last cPanel update (maybe 11.48.4) it is no more possible to define a forwarder on an email address that is not defined on the cPanel server. To get around this limitation TZBM uses hooks to create a corresponding cPanel email address before the definition of the forwarder and then delete this email address once the forwarder is created.
For this to work, you need TZBM >= 0.9.6.
Current limitations
At this time the account type (full/partial) for a package or an account configuration is not yet supported. The plugin is not able to manage full Business Mail accounts which have emails defined only on a zimbra server. This will be developped in the future.
When the name of a server is updated, this update is not automatically transmitted to package and account configuration. If necessary, you have to re-save package and account configurations that are related to this server to update the users configurations. And update the Mailbox List File with the dedicated button of the WHM plugin interface.